

Drain Power Flashing: Stop Water Ingress is a practical way to seal drain penetrations and junctions so groundwater and surface water do not find a path into basements. Many homeowners first notice damp corners, a musty odour, or seepage at the floor–wall joint before they suspect a flashing problem. In the Toronto and GTA area, seasonal thaws and heavy rainfall can make these symptoms more visible, so a quick assessment can be helpful.
If you want to discuss a specific concern, feel free to contact us or call (905) 601-9449. We offer fast 24/7 assistance, free estimates, licensed and insured service, and warranty-backed work. During an on-site review we explain options and timelines so you can choose what fits your home and budget.
What Drain Power Flashing Does
This section explains the purpose of flashing around drains and why the detail matters for basement waterproofing.
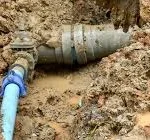
Drain flashing is a layer of material that wraps or seats around a drain penetration to keep water from tracking between the drain and the foundation or slab. Properly installed flashing ties into the waterproof membrane and the drain bowl or clamp so water moves into the intended drainage system rather than into the wall. Homeowners often see small signs first: damp paint, efflorescence, or a localized musty smell near a drain or pipe.
Addressing flashing is usually part of a broader plan that looks at grading, downspouts, and interior drainage. If the flashing needs repair or replacement, trades typically use durable materials such as metal flashing, EPDM boots, or pre-moulded pipe flashings and connect them to the membrane and clamp assembly. For repairs and related services, we can review options during a site visit and can book a free estimate through our drain repair & services team.
Typical Inspection And How Flashing Is Installed
This section outlines what an assessor checks on arrival and the common installation steps that follow.
On-Site Assessment Steps
Inspectors follow a set of routine checks to form a scoped plan that fits the home and local code.
- Visual check of interior signs: damp areas, paint blistering, or staining near drains and floor–wall joints.
- Exterior review of grading and downspouts to see whether surface water is directed away from the foundation.
- Examine the drain bowl, clamping ring, and the termination of the waterproof membrane; note accessibility and material condition.
- Record measurements and photos for the estimate and, if needed, plan for minor excavation to access the penetration.
Flashing Materials And Tie-In Methods
There are common material choices and techniques that help a flashing detail perform over time.
Metal flashings and molded EPDM boots are often selected for their durability and flexibility. Pre-moulded pipe flashings or rubber boots are used for round penetrations; clamping rings or mechanical seals hold the flashing tight to the drain bowl. The flashing is integrated with the waterproof membrane by overlapping and bonding or by mechanical termination that accepts the membrane edge.
Installers account for differential movement between the slab and pipe, follow manufacturer guidelines, and align work with local practices in the Toronto and GTA area. Before any work, we review grading, foundation details, and plumbing so the plan fits your home and local code. For municipal context on basement flooding prevention in Toronto, an official overview can be helpful.
Timelines, Typical Costs, And What To Expect On Site
This section gives realistic timeframes and cost ranges and describes the typical on-site workflow for flashing repairs and replacements.
Minor flashing repairs or clamp reseating often take 1–2 days and commonly range from $200 to $800 depending on access and materials. A full re-flash that ties a new EPDM or metal flashing into an existing waterproof membrane usually takes 1–3 days to complete and typically runs from $800 to $3,500. Larger foundation or excavation work is quoted separately and may affect the schedule.
On day 1, the team will confirm the scope, document conditions with photos, and prepare the work area. Work phases usually follow this order: preparation and cleaning, removal of failed material, flashing installation and mechanical clamping or bonding to the membrane, and a functional check. Cleanup and a short demonstration of the repaired area are included so you know what maintenance to expect.
Risks, Common Mistakes, And How We Address Them
This section frames likely issues calmly and describes practical steps the contractor takes to manage them.
Common mistakes include terminating flashing with surface sealant only, improper clamp seating, or failing to tie the flashing into the waterproof membrane. These can lead to recurring damp spots or water tracking behind finishes. Every property has nuances; we talk them through so you feel informed and comfortable with the plan.
Before any work, we review grading, foundation details, and plumbing so the plan fits your home and local code. If drainage or downspout problems are present, we present options that may include complementary work such as sump pump checks, backwater valve review, or changes to exterior drainage. We describe trade sequencing and expected access needs so there are no surprises during the job.
Example Case And Quick Homeowner Checklist
This section presents a short numeric example and a practical checklist homeowners can use before an on-site estimate.
Mini-Case: Bungalow Reflash Example
Here is a representative scenario to give a clear sense of scope and outcome.
Situation: a 1950s bungalow showed damp paint and a small stain at the interior floor–wall joint near a laundry drain. Diagnosis: old membrane termination and a failing clamp. Work performed: remove the bowl, install an EPDM pre-moulded boot, fit a new clamping ring, and overlap the boot with the waterproof membrane. Timeline: 2 days on site. Cost example: roughly $1,200 including materials, labour, and cleanup. Result: homeowner reported reduced visible moisture and a schedule for annual checks and sump testing.
Homeowner Checklist Before The Estimate
Use this checklist to prepare for the visit and help the estimator scope work accurately.
- Take clear photos of the drain, floor–wall joint, and any visible stains or mouldy areas.
- Note when the problem first appeared and whether it follows heavy rain or spring thaws.
- Gather records of prior repairs, sump pump service, or installation dates for existing membranes.
- Clear an access path to the affected area and note outdoor downspout locations and grading near the foundation.
- Ask about maintenance frequency; a simple schedule is to inspect flashings and drainage annually and after major storms.
For broader solutions that tie into exterior work, see options for basement waterproofing as part of a coordinated plan.
Next Steps For A Dry, Comfortable Basement
A few considerations we review together include a focused on-site assessment, a written estimate with phased options, and a clear timing plan that fits your schedule. If work is agreed, we provide a timeline, describe access and cleanup steps, and review any code or permit notes relevant in Toronto and the GTA.
If you would like to arrange an on-site review, please contact us or call (905) 601-9449. We offer fast 24/7 assistance, free estimates, licensed and insured service, and warranty-backed work, and we focus on clean, careful execution so you feel confident about the next steps.
This article offers general information for homeowners and is not engineering, legal, or plumbing advice. Assessments and solutions are reviewed during an on-site visit by licensed professionals. If you’re considering waterproofing or drain work, feel free to contact us or call — we’ll discuss your goals and outline a plan that feels comfortable and right for your home.
🔗 Learn more: https://waterproofingdrain.com/
📞 Call us: 905 601-9449
✉️ Write us: info@waterproofingdrain.com
🕒 Open hours: Mon – Sat, 9:00am – 9:30pm